When gravity takes over, the downhill part of your splitboarding adventure isn`t really any different than a descent on a traditional solid snowboard. But the two-plank split ascent poses some new challenges for those just starting out on their splitboards. Here are some tips for beginner splitboarders that will help you get to know your new equipment and make your uphill more effective, efficient & safe so you can have an enjoyable shred session on the way down.
Splitboarding Tips & Tech for Beginners 101
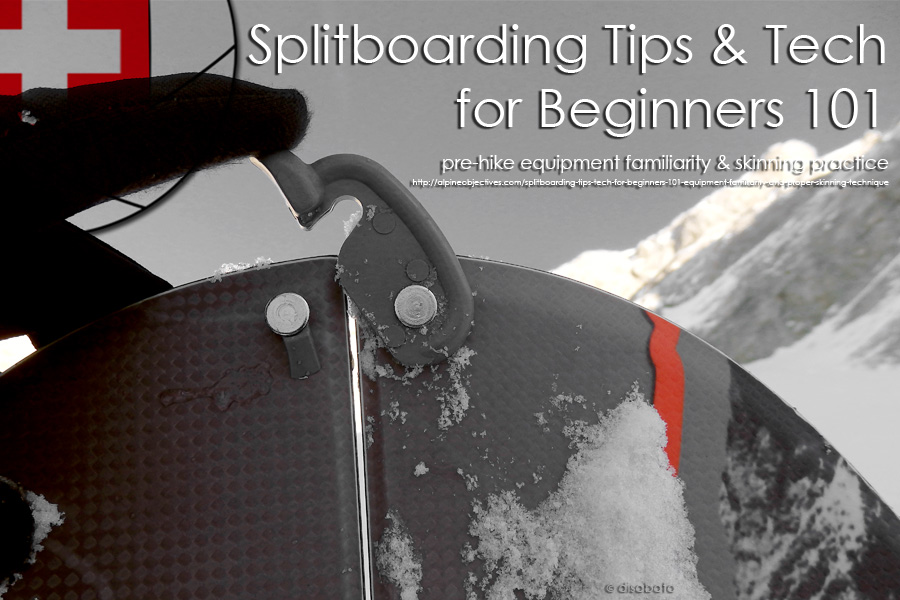
1. Get familiar with your splitboarding gear indoors prior to your first outdoor excursion.
Be sure to assemble/disassemble/reassemble from split-to-ride-to-split mode in a safe place before you take your first hike. Fumbling, dropping and maybe losing essential components under your couch for the first time has very little resemblance to fumbling, dropping and losing essential components on a knife-edge ridgeline in the backcountry. The former means you leisurely search until you find it, the latter means you`re in a life threatening situation.
2. Pay close attention to your stance width
Mounting bindings onto a splitboard requires an additional step and additional specialized components. You will need to carefully measure your stance width to find a comfortable “balance” between powder & variable snow condition riding. Why? Because changing your stance width on a splitboard is kind of a pain in the ass. There are static, non-moveable interface components that remain attached to the inserts of your deck while the actual binding slides on-and-off (or otherwise detaches) to easily transition from hike-to-ride-to-hike modes. It`s advisable to set your fixed insert components in a way that allows you to remain in a versatile stance that can handle not only the deep, untouched pow you are ultimately hiking for but also to safely negotiate less than perfect conditions you might find in the backcountry (i.e. ice, rocks, windblown or sun affected crust, etc.). If you decide to shift your fixed insert components to adapt for specific snow conditions, do it in a secure environment where you will not risk losing screws or having difficulty in freezing/inclement weather at altitude.
2. Practice on flat ground in split and ride mode before your first ascent.
It`s smart to make a few tests outside in the snow by switching from split-to-ride-to split mode on flat ground in a controlled area. You can never have too much practice at this. Likewise, it`s important to slide around — especially in split mode — on flat ground in a safe environment before heading upwards into the high-country. This goes for any splitboarder with new gear — novice or expert — so that you can feel how your equipment reacts underfoot. If you are a true beginner without any splitboarding experience, it`s recommended to spend your entire first day strictly on flattish ground in split-mode learning how to properly manipulate planks, poles and body in unison. As mentioned above, also check to ensure your stance is set at the proper width in ride-mode while in a flat area. Adjusting your stance on a splitboard is more time consuming and labor intensive than simply moving your bindings on a solid board as there are specialized binding-to-board interfaces making binding adjustments more technical and not advisable after you`ve already begun your ascent.
3. Slide forward with your skins…don`t step.
When moving forward in split mode, it`s imperative to learn proper skinning technique. When skinning, slide your plank forward by starting the movement from your heel, not picking-up your foot into the air. It seems strange but serves two main purposes. First, it helps keep strong contact between skin-and-snow. By sliding smoothly forward, the hairs of your skins flatten uniformly, ultimately allowing them to grip the snow as you apply pressure downward on that plank as the other foot slides forward. Secondly, sliding helps save energy by making your equipment efficiently work for you, not against you. Stepping forces you to fight gravity with each ill-advised upward leg movement. Believe it…you`ll have plenty of gravity working against you, so don`t add to the potentially agonizing uphill. Also, remember to keep a bit of flexion in your knees by slightly sinking straight downwards from your hips. Straight legs and snowsports definitely don`t belong together (unless you`re throwing an old-school spread eagle on skis or boning out a stalefish on your board).
4. Body, planks, poles…all together now.
Poles and snowboarding usually don`t mix, but you need to get comfortable with these essential foreign objects on the uphill if you plan to enjoy your downhill descent. Eventually, you`ll find a smooth, subconscious rhythm with all components – body, planks & poles – working in harmony. To get started, keep in mind that when one foot slides forward, the pole in your opposite hand extends outward to ultimately plant in the snow. Left foot slide forward, right pole extend & plant, right foot slide forward, left pole extend & plant. The movement will eventually begin to blur into one fluid bio-mechanical masterpiece wherein your pole plant actually coincides with the timing of your same-side plank sliding forward next to it, ultimately generating consistent force. Be aware that when on flat ground, very little arm extension is required. That is, your pole plants will be basically directly off to the side of your bindings and require very little downward pressure to maintain momentum. However, when ascending on steeper terrain, you`ll notice the inverse relationship of plank sliding to pole planting. You will need to extend your arms much farther out in front and apply far more pressure downward on your pole plant to aid your balance & generate power when moving upwards.
5. Sidestepping is basic, but if you don`t master it, progression on your splitboard is impossible.
Sidestepping is an essential splitboarding skill that is easy to learn, but also one of the most significant in terms of safety and efficiency for all skill levels. Although sidestepping is predominately accomplished through lower-body movement, as is nearly always the case, symbiotic pole control and upper-body core balance are essential. To begin practicing your sidestepping technique, position yourself at the bottom of a small slope with gentle incline. Turn sideways across the fall-line of the hill. Plant one pole on the outside of your downhill plank and the other on the outside of your uphill plank. Pressure downward on the INSIDE edge of your DOWNHILL plank while simultaneously pushing downward on your downhill pole. In unison with the movements described above, step sideways upwards with your UPHILL plank, reposition your uphill pole plant farther above and pressure downward on your uphill pole and on the OUTSIDE edge of your UPHILL plank. Bring your downhill plank parallel with your uphill plank. Maintain OUTSIDE edge pressure on your UPHILL plank and INSIDE edge pressure on your DOWNHILL plank. Repeat movement slowly until you build confidence and can fluidly sidestep more quickly.


Comments are closed.